
What do we need?
- Image LibreELEC for the RaspberryPi 3B+ (Advert)
- Windows PC
- Software: Win32DiskImager
- Software: 7-Zip
- microSD Card Reader
Install needet Software
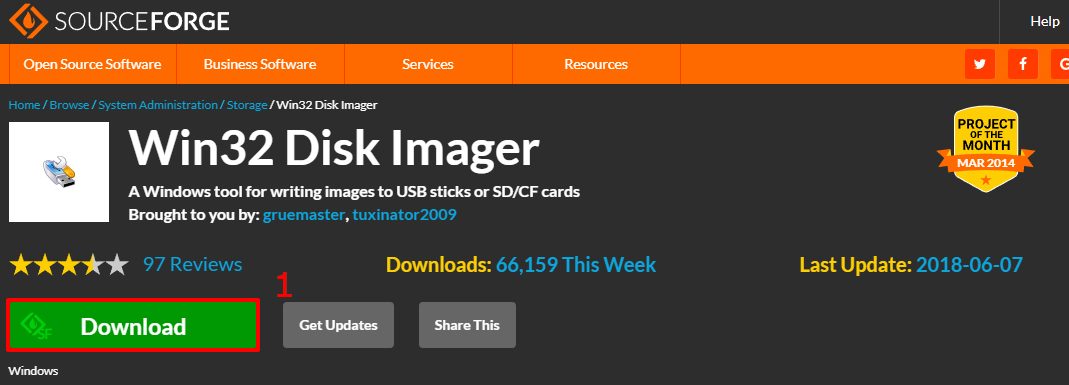
First you get the programs needed to load the image onto the SD card. Here is the Win32 Disk Imager. Just click on the download button[1] as you can see in the picture below.
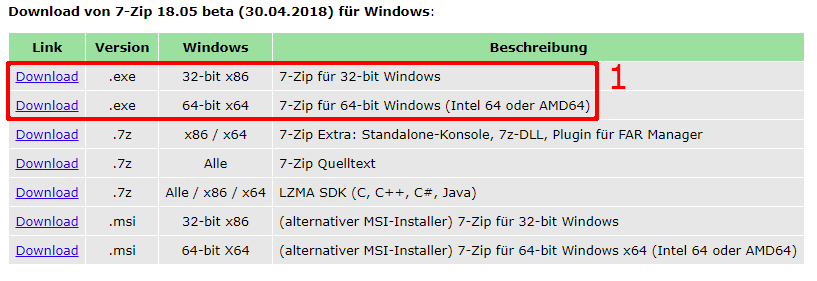
7-Zip you can Download here. On the download page select the 32bit or 64bit version for Windows [1]. If you are not sure which version you need you should install the 32bit version.
Download LibreELEC
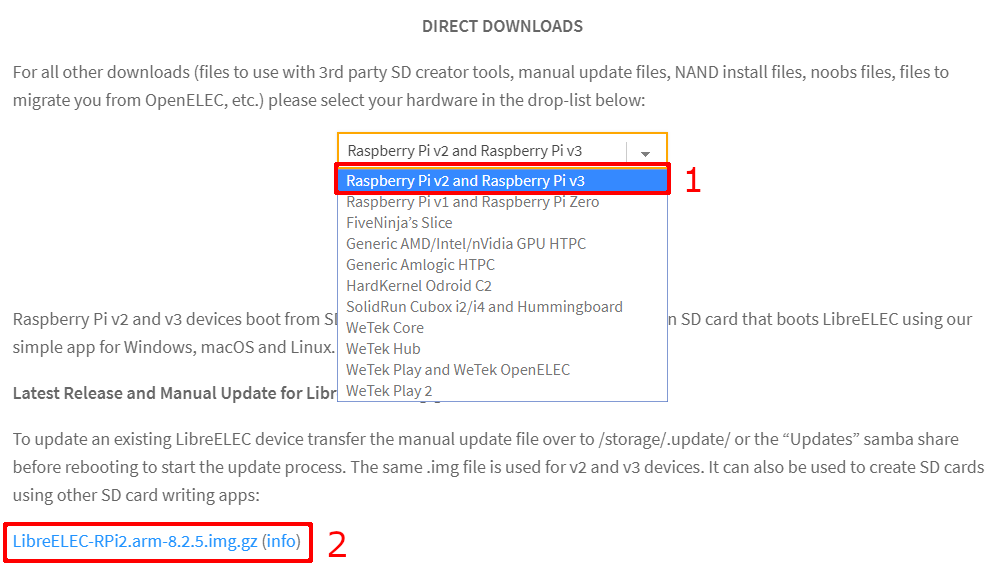
The image of LibreELEC can be downloaded from Projek Homepage. Scroll down a bit, select the hardware under “Direct Downloads” [1] and then download the image [2].
LibreELEC Download
The downloaded image is a GZ file and must be unpacked. We do this with the software 7Zip, which we installed before. Simply select the file, right click on it and unzip the 7Zip files [1].

Install LibreELEC on the microSD card
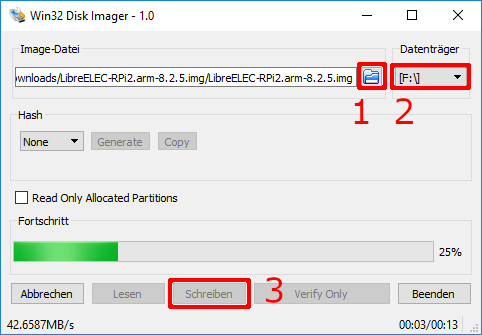
Now insert the SD card into the card reader, start the Win32 Disk Imager and confirm the security warning. If the program is open, select the previously unpacked image via the folder symbol [1]. Now you have to select the drive [2] on which the image should be played (corresponds to the drive letter assigned to the SD card). To start the writing process, just click on “Write” [3]. When the writing process is finished you get a message and can remove the SD card.
Note: It is important to use the correct drive letter otherwise data on the wrong drive will be overwritten! Recently (13.10.2018) I get several messages from Windows after starting the write process (regarding formatting of the card and folders open). The messages can be ignored, the folders can be closed, then the drive has to be selected again and the process has to be started a second time. Then it works without any problems.
LibreELED is now installed on the SD card. This card can now be inserted into the RaspberryPi and started for the first time after connecting it to the TV.
Note: At the first start it is recommended to connect a keyboard. A few entries must be made, this is more comfortable with the keyboard than with the remote control of the television.
What’s the next step?
The following configuration of Kodi for receiving LiveTV via a TVHeadend server is described here. At the moment only available in German.
Recent Comments